Let’s be totally honest for a second. The idea of waking up early, putting on matching athletic wear, and driving across town to a boutique fitness studio sounds amazing in theory. In reality? It is usually a massive hassle. Dealing with morning traffic, hunting for street parking, and paying thirty five dollars for a single fifty minute class gets old really fast. That is exactly why creating your own little sanctuary with the right pilates at home equipment is one of the absolute best favors you can do for yourself this year. You do not need a sprawling mansion or a dedicated, mirror lined home gym to make it work. You just need a little bit of floor space, a few carefully chosen tools, and the motivation to actually unroll your mat when your alarm goes off.
I vividly remember when I first tried doing a mat routine in my living room. I thought I could just use my slippery old yoga mat and wing it. That was a terrible idea. I ended up sliding all over the hardwood floor during a plank and tweaking my wrist so badly I had to ice it for two days. That is when I realized that while you definitely do not need a massive, expensive reformer machine to get a good workout, you absolutely do need the right basic tools. Proper gear makes the difference between feeling like a graceful powerhouse and feeling like a clumsy mess fighting against gravity. Plus, investing a little bit of money in your setup is a great psychological trick to commit to your routine. When your gear is staring at you from the corner of the room, you feel a gentle nudge to use it. If you are looking for more ways to prioritize your well being and build habits that actually stick, you can always check out our self care tips for practical inspiration on romanticizing your daily routines.
Why You Need Proper pilates at home equipment (and Why You Do Not Need to Spend a Fortune)
When most people hear the word Pilates, they immediately picture those intimidating torture devices otherwise known as reformers, Cadillacs, and Wunda chairs. And look, those machines are undeniably incredible. They offer amazing resistance, support, and endless variations. But you absolutely do not need them to get the core shaking, muscle burning benefits of the practice. Mat work is actually how the method started for injured dancers and soldiers, and it remains brutally effective all on its own. In fact, many instructors argue that mat work is harder because you have no springs to assist you; it is just you fighting your own body weight.
The beauty of building your own setup is that you can scale it entirely to your budget and your available space. You are not trying to replicate a commercial studio with mirrored walls and ambient lighting. You are trying to create a functional, comfortable space where you can focus on your mind and body connection without being distracted by a mat that keeps rolling up at the edges, or a resistance band that unexpectedly snaps mid stretch. It is all about reducing friction in your daily life. If your gear is easy to access, pretty to look at, and pleasant to use, you are infinitely more likely to actually get your workout done. It is simple psychology.
Here are just a few reasons why setting up your own space is superior:
- You save incredible amounts of money on studio fees.
- You can work out in your pajamas without anyone judging you.
- You completely eliminate the commute time.
- You can pause your workout to let your dog outside.
The Absolute Essentials To Start Here
If you have literally nothing right now and just want to get started this weekend, please do not buy everything at once. Start with the foundation. You can always buy more stuff later when you figure out what you actually enjoy doing.
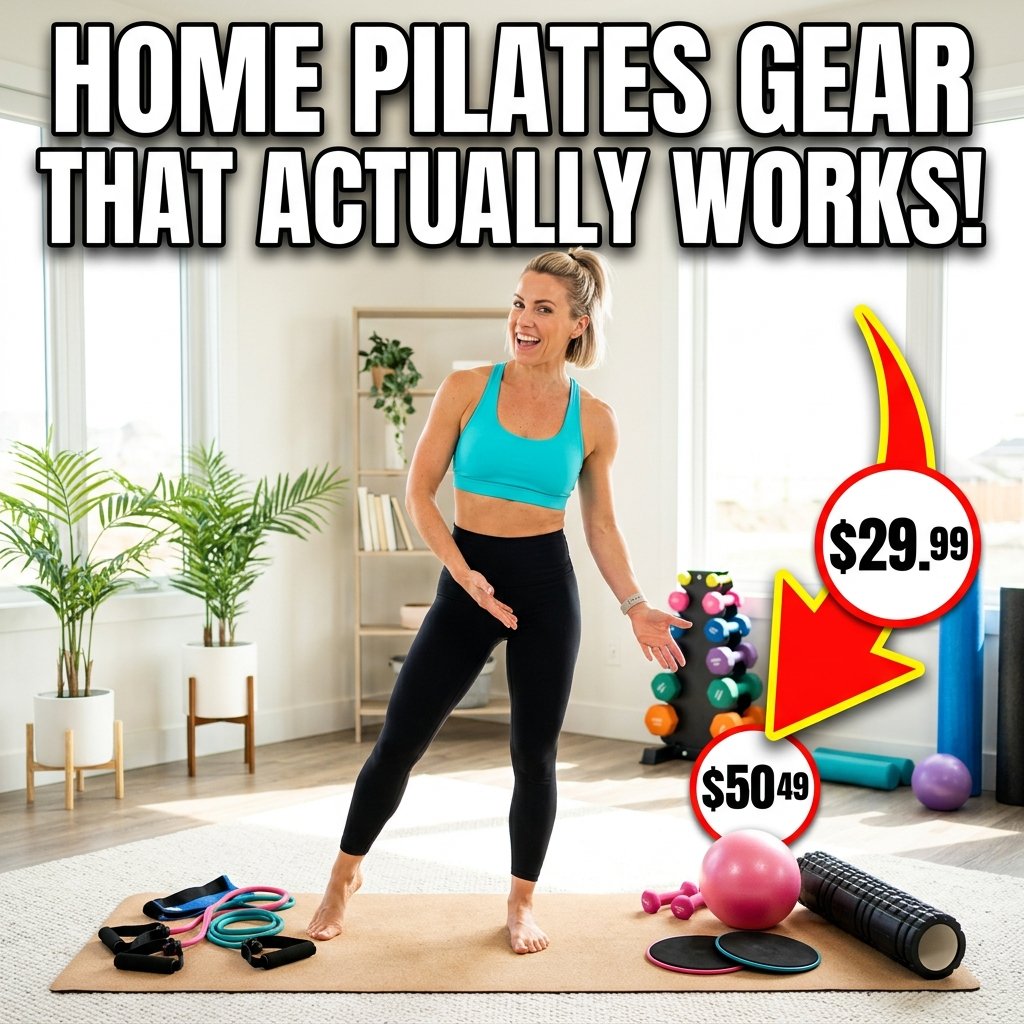
1. A Thick Supportive Pilates Mat
This is my hill to die on: a standard yoga mat is not a Pilates mat. Yoga mats are specifically designed to be thin and sticky so you can balance in standing poses without wobbling. Pilates, on the other hand, involves a ton of rolling around on your spine. If you try to do exercises like rolling like a ball on a three millimeter yoga mat on a hardwood floor, you are going to bruise your vertebrae. It hurts, and it will make you hate the exercise. You need a mat that is at least half an inch thick. It should feel like a dense, squishy cushion under your back. Yes, they are a bit bulkier to store and carry around, but your spine will thank you profusely. Trust me on this one.
2. Grippy Socks
I used to firmly believe that grippy socks were a scam invented by studios to make an extra twenty bucks off you when you forgot yours at home. I was entirely wrong. When you are doing a plank, a downward dog, or a bridge on a thick mat, your bare feet will inevitably get sweaty and slip. Regular cotton socks are an actual safety hazard. Grippy socks give you the traction you need to engage your leg muscles properly instead of wasting half your energy just trying not to slide away from your center. Plus, they keep your toes warm if you are working out in a drafty house in the middle of winter.
Leveling Up Your Resistance Gear
Once you have a good mat and some socks, you can perform hundreds of different exercises. But eventually, you might hit a plateau or just want to add a little spice to your usual routine. This is where the fun, affordable props come in.
3. Resistance Bands
Resistance bands are cheap, they take up zero space, and they are incredibly versatile. I highly recommend getting a long, unlooped band that looks like a giant ribbon and a set of smaller loop bands. The long band is amazing for assisting with tight hamstring stretches, mimicking reformer strap exercises for your arms, and adding resistance to your upper body work. The small loop bands are perfect for lower body burners like clamshells, squats, and crab walks. A quick pro tip: if you hate how thin latex loop bands roll up and pinch your skin, spend a few extra dollars on the fabric ones. They stay put, they do not snap, and they are so much more comfortable to wear on bare skin.
4. The Magic Circle
This innocent looking little hoop with two padded handles on the sides is often referred to as the ring of fire, and for very good reason. It provides gentle to moderate resistance and is brilliant for helping you find your center line. You can squeeze it between your thighs during bridges to engage your inner thighs, or press it between the palms of your hands to fire up your chest, shoulders, and lats. It forces you to engage tiny stabilizing muscles you did not even know you had. It is also shockingly durable; I have had the exact same generic one for five years, and it still has not lost its shape or resistance.
5. A Small Stability Ball
You can usually find these squishy, nine inch inflatable balls for under ten dollars. They are incredible for supporting your lower back during seated core work. Placing the slightly deflated ball behind your tailbone while you do ab curls gives you support and increases your range of motion, making the exercise way harder and more effective. You can also place it between your knees or ankles to ensure your legs stay properly aligned.
6. Light Dumbbells or Wearable Weights
We are talking extremely light here, like one, two, or maybe three pounds max. This practice is all about muscular endurance and control, not maxing out your heavy lifts. A pair of wearable wrist or ankle weights can completely transform a basic mat routine. Suddenly, simple arm circles feel like lifting lead, and leg lifts become a serious, trembling challenge. If you do not want to splurge on the aesthetic wearable ones, basic neoprene dumbbells work just fine. According to experts at the Mayo Clinic, incorporating light resistance into your core and balance routines can significantly improve your overall functional fitness and prevent injuries.
Building Your Personal Studio Without Losing Your Mind
Okay, so you bought the stuff. Now where do you put it? You do not need a spare bedroom or a finished basement. You just need to be smart about your space. If you are interested in integrating this fitness habit into a broader healthy lifestyle, check out our articles on fitness and wellness for more ideas on setting up daily routines that actually work for you.
I live in a relatively small apartment, so I know the struggle intimately. My first piece of advice is to never store your equipment in the back of a closet or under a heavy bed. If it is out of sight, it is out of mind. I keep my rolled up mat in a nice woven basket in the corner of my living room, right next to the television. My resistance bands, grippy socks, and magic circle live in that same basket. It looks intentional, almost like textured decor, and it is always right there staring at me when I try to sit on the couch and binge watch a show.
When you set up to work out, make sure you have enough clearance. You should be able to swing your arms and legs in a full circle without hitting a coffee table, knocking over a lamp, or kicking your dog in the face. I actually managed to kick a full glass of water off my side table during a side lying leg series once. It was a massive disaster that ruined my workout. Move the furniture if you have to. It takes thirty seconds, and it gives you the physical freedom to move without holding back.
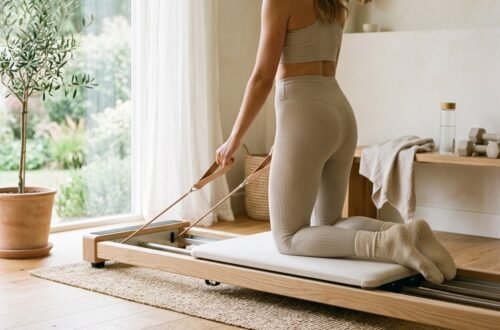
Is the Fancy Equipment Worth It?
Let us address the elephant in the room. What about the big machines? You have probably seen influencers gliding effortlessly on their gorgeous oak wood reformers in their sun drenched homes. It looks amazing. But let us be real for a second: a high quality home reformer costs upwards of two to three thousand dollars, requires a massive amount of floor space, and is incredibly heavy to move.
If you are a highly advanced practitioner, you have the extra budget, and you have a dedicated room to leave the equipment out permanently, then sure, a home reformer is a wonderful, life changing investment. But for ninety five percent of normal people, it is complete overkill. You can achieve almost identical results with a mat, a pair of cheap gliders, and a strong resistance band. The magic of this practice is not in the metal springs and leather pulleys; it is in the precision of the movement and the engagement of the mind. Your body weight provides more than enough resistance if you are doing the exercises correctly. The Cleveland Clinic notes that mat based routines are highly effective for improving flexibility, muscle tone, and core strength without the absolute need for complex machinery.
A Quick Twenty Minute Home Routine Using Your New Gear
You have got your equipment all set up. Now what do you do with it? Here is a simple, highly effective routine you can do in your living room right now. No complicated choreography, just solid, muscle trembling basics.
Step 1 The Hundred Warm Up
Lie flat on your back on your thick mat. Bring your legs to tabletop position with knees bent at a strict ninety degree angle. Curl your head, neck, and shoulders off the mat, looking at your belly button. Extend your arms straight by your sides, hovering just above the floor. Pump your arms vigorously up and down while you inhale deeply for five counts and exhale fully for five counts. Do this ten times to reach one hundred pumps. This gets your blood flowing and fires up your core immediately. If your neck hurts, just put your head down. It is totally fine.
Step 2 Bridging with the Magic Circle
Keep lying on your back. Bend your knees and place your feet flat on the floor, about hip width apart. Place your magic circle between your inner thighs, just slightly above your knee joints. Give it a gentle squeeze so it does not fall. Now, press firmly into your heels and peel your hips off the mat, articulating your spine one single vertebra at a time until you are in a high bridge. Hold at the top, pulse a squeeze on the circle five times, and slowly roll back down like a string of pearls dropping onto the floor. Repeat this eight times. Your hamstrings and inner thighs will be screaming in the best way possible.
Step 3 Side Lying Leg Work with Booty Bands
Roll onto your right side and prop your head up on your hand, or lie flat on your extended arm. Slip a fabric resistance band around your thighs, just above the knees. Bend your knees slightly. Keep your feet glued together and open your top knee like a clamshell, fighting the heavy resistance of the band. Do fifteen slow reps. Then, extend your top leg straight and lift it up and down fifteen times. Switch sides. This is exactly how you build intense glute strength without doing a single heavy barbell squat.
Step 4 The Roll Up Cool Down
Lie flat on your back with your legs extended straight out. Hold your long, unlooped resistance band in your hands, shoulder width apart, and reach your arms overhead. Inhale, bring your arms directly above your chest, tuck your chin, and slowly roll your spine all the way up to a seated position, reaching forward toward your toes. The band helps keep your shoulders pulled down and engaged. Exhale and slowly roll back down, resisting gravity all the way. Do this five times. It acts as a beautiful massage for your spine and a great stretch for your tired hamstrings.
Why pilates at home equipment matters for your routine
If you have been putting off starting with pilates at home equipment, now is a good time to reconsider. Most people who make pilates at home equipment part of their regular self-care schedule notice a real difference within the first few weeks. The secret is not doing everything perfectly from day one. It is just starting.
One thing that surprises a lot of people about pilates at home equipment is how quickly it becomes second nature. You do not have to overhaul your life. A few small, consistent changes go a long way. Whether you are brand new to pilates at home equipment or have been doing it for a while, there is always something new to learn or try.
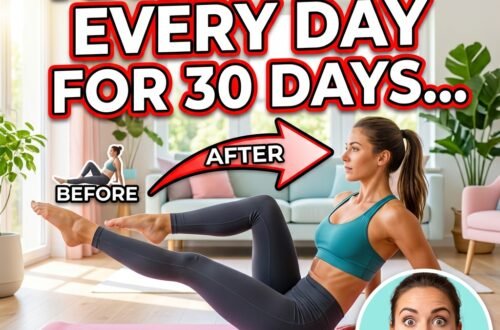
The bottom line is that pilates at home equipment is worth the investment of your time and attention. Give it a genuine try for 30 days and see what changes. You might be pleasantly surprised by the results.
Frequently Asked Questions
I get asked a lot of the same questions by friends and family who are trying to set up their own workout spaces at home. Here are the most common things people desperately want to know before they start buying things.
Can I do Pilates on my bed?
Technically, you can move your body anywhere, but I strongly advise against doing it on a bed. Beds are soft and squishy. They absorb all your energy and make it impossible to keep your spine in neutral alignment. You need a firm, stable surface to push against. If your floor is too hard, double up your mats, but get out of bed.
Do I need a reformer to see results?
Absolutely not. Reformers are incredibly fun, but mat work is often actually harder because you do not have the springs assisting you. You are lifting one hundred percent of your own body weight against gravity. If you are consistent with your mat routine, you will get stronger, your posture will drastically improve, and you will absolutely see results. Period.
Can I just use a yoga mat?
I said it before and I will say it again: please do not do this. Unless you want a severely bruised tailbone and spine, invest in a proper, thick mat. It is the single most important piece of equipment you will ever buy for this practice. Do not skimp on it just to save ten dollars.
How often should I work out at home?
Consistency beats intensity every single time. Doing twenty minutes a day, four days a week is far better for your body and your nervous system than doing a single grueling ninety minute session on Saturday and doing absolutely nothing the rest of the week. Find a realistic schedule that fits your messy life and stick to it.
What is the difference between Pilates and yoga equipment?
Yoga equipment is usually geared toward helping you achieve static stretches and balances like thin sticky mats, hard cork blocks, and long cotton stretching straps. Pilates gear is much more focused on adding dynamic resistance and cushioning the spine like very thick foam mats, heavy elastic bands, and squishy balls.
Are resistance bands as good as free weights?
They are different, but equally effective in this context. Dumbbells provide constant downward resistance due strictly to gravity. Resistance bands provide progressive resistance, meaning the harder you pull, the heavier it gets. This is incredible for building long, lean muscle and controlling the lowering phase of an exercise, which is a core fundamental principle of the method.
How do I clean my equipment?
For your thick mat and any rubber resistance bands, just wipe them down with a mixture of water and a few drops of mild dish soap. Do not use harsh chemical sprays on rubber or latex, as it will cause them to degrade and eventually snap. You can toss your fabric bands and grippy socks right into the washing machine on a cold cycle.
What if I do not have room to store anything at all?
If you live in a literal shoebox apartment, just get a mat and a pair of socks. You can slide the mat right under your sofa or bed when you are not using it. The socks go in your underwear drawer. You truly do not need a lot of physical stuff to get started. Do not let a lack of space be your excuse. Just start somewhere, even if it is imperfect.
At the end of the day, building your home practice should not be a stressful endeavor. It should be genuinely fun. You are curating a tiny slice of your home dedicated entirely to making you feel good in your own body. So grab a thick mat, find some cute grippy socks, and carve out twenty minutes for yourself today. You will not regret it.
n
There are many ways to approach pilates at home equipment depending on your goals and lifestyle. Some people prefer to start simple with pilates at home equipment and gradually add more steps. Others dive straight into a full pilates at home equipment routine from the beginning. Either approach can work well as long as you stay consistent with pilates at home equipment over time.
It helps to keep a small journal or notes app entry about your experience with pilates at home equipment. Tracking what works and what does not makes it much easier to adjust your approach and see patterns in how your body or lifestyle responds to pilates at home equipment.
Learning more about pilates at home equipment can genuinely improve your everyday routine. The key with pilates at home equipment is to stay consistent and patient as you build new habits.
Using pilates at home equipment correctly is something that takes a little practice at first. Once you figure out the right method for pilates at home equipment that suits your specific needs, it starts to feel effortless. Many people say that committing to pilates at home equipment consistently for just three or four weeks completely changed how they feel about their routine. Start slow, be patient, and trust the process with pilates at home equipment.